
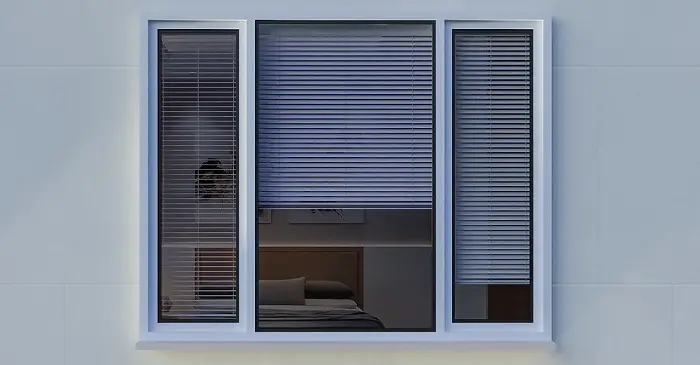
The need to keep your home beautiful cannot be underestimated. When we think of the window blinds, we see beyond the beauty it brings.
Beyond the decorative purpose, blinds greatly help to provide privacy. They also help to control your room’s lighting. The thought of how greatly the blinds spiff up a room, is refreshing in itself!
First things first, before installing window blinds!
Will you be mounting the blinds on the inside of the window or on the outside? That decision will determine the next steps you will take.
Most of the time, mounting the blinds inside the windows gets more votes. The blinds in this case look tidier than the ones you mount outside.
Outside blinds cover some portions of the window frame. When you later remove the blinds, the holes you mount the bracket tend to show. Doesn’t sound too cool, right?
Can you try DIY on installing blinds?
What about installing the blinds? Must you get a professional? Or is it something you can hack?
Are you torn between hiring an expert to install your blinds, or whether to go the DIY route?
The following factors will help you choose right:
- Your window measurements- Consider the shapes and the sizes of your windows. If the window measurements could give you trouble with keeping it accurate, go for the expert!
- Product type- If your window is either horizontal or rectangular, the installation will be easy. Otherwise, consider hiring an expert.
- Tools- Do you have all the tools you need for the DIY installation? If you do, go ahead and have fun with the installation. If not, the expert will have all the tools you need. The basics you would need include a ladder, a drill, screwdriver plus a tape measure.
- Time- How is your schedule like? Does it allow ample time for the DIY installation? If not, then save the little time you have- simply dial up that expert!
Now, lets to go to the heart of the matter
How to properly install window blinds
The first step is to get the right tools together.
The tools you will need:
- A pencil
- A tape measure
- Power drill
Do you mean that the short list above is complete? Perfectly so!
Step by step guidance on how to install blinds
Installing your blinds is not only easy- it is fun too!
- Measure your windows
You will need the correct window measurements to install your blinds correctly. When working with an inside mount, check for the section where the window glass meets the casing. Measure that.
Take the measurements of the width of the window as well. Take the width at the middle, the top and the bottom.
If by any chance the measurements differ, use the smallest figures.
- Buy the correct blinds
The measurements you took in the above step will come in handy at this point. Get the right sizes of the blinds, based on your measurements.
Get the right type too. You can choose from aluminum, wood, vinyl or PV. The choice is purely based on your personal preference.
Where are you installing the blinds? If in your child’s room, or in the nursery, then use the blinds whose paint is certified lead-free.
Tip: White blinds have a great effect on your space. They make your room look neat and clean. And if you are looking to soundproof your room then get thick fabric blinds.
- Mark your blinds mounting
Unpack the blinds you purchased. Check if they have some instructions on mounting. If so, follow the along with what we are giving you here. The pencil will come in handy to make the markings for the brackets.
For the inside mount, start by placing the head rail, right inside the casing. Even if your window is not level, ensure to keep it level. Check below the head rails and put your pencil marks on each end.
Attaching the blinds
- The first step is to open the bracket door.
Ensure the end brackets are well held in place. Check the pencil marks you made. Place the brackets inside the marks. One of the open sides of the brackets should face you. The other open side should face the central point of the window.
Is your bracket door tricky to use? Try opening it up with your screwdriver plus your finger.
- Mark your drilling points
Make use of your pencil again. This time, to help you mark the points you will be drilling. You will need two of the pilot holes. To get sturdier brackets, work with two diagonal holes.
Ensure the two holes are even.
For the outside mount, place the brackets on the face of the window that faces outside. Do that on both sides of your window.
Are you working with an inside mount? Check the inside top corner on every side of your window. Place your brackets against them.
Now to the drilling!
You will notice that each bracket is accompanied by two screws. Are you drilling into the wood? The hole you drill should be smaller than the screw you will be using to attach your brackets. A 1/16 diameter drill will be great on wood.
Other materials such as concrete, tiles, bricks, stone, drywall, will require you to use the appropriate plugs, anchors and screws.
Let’s now install the headrail and valence
We are almost done!
- Snap the valence clips, but not directly on top of the ladder. The valence is what brings out the decorative part of the headrail.
- Before inserting the headrail into the bracket, clip its front lip and snap the valence clips over it.
- Fix the head rails into the brackets. You will need to open the bracket doors widely, insert the head rail then snap back the door closed. While at it, ensure you hear that snapping noise.
- Attach the valence in the position you desire it to lie. When done, press them firmly, so that they hold in nicely.
Your window blinds are now on
Secure your blind band- Did your blinds come with a band to open and close them? Did that come pre-attached? If not, go ahead and attach them.
To do that, check the hook up and see its plastic sleeve. Get the wand’s end and insert it into the hook. Finally, check the plastic covering and slide it back down.
Congratulations, your beautiful blinds are successfully installed and your room now looks absolutely cool!